When you click on links to various merchants on this site and make a purchase, this can result in this site earning a commission. Affiliate programs and affiliations include, but are not limited to, the eBay Partner Network.
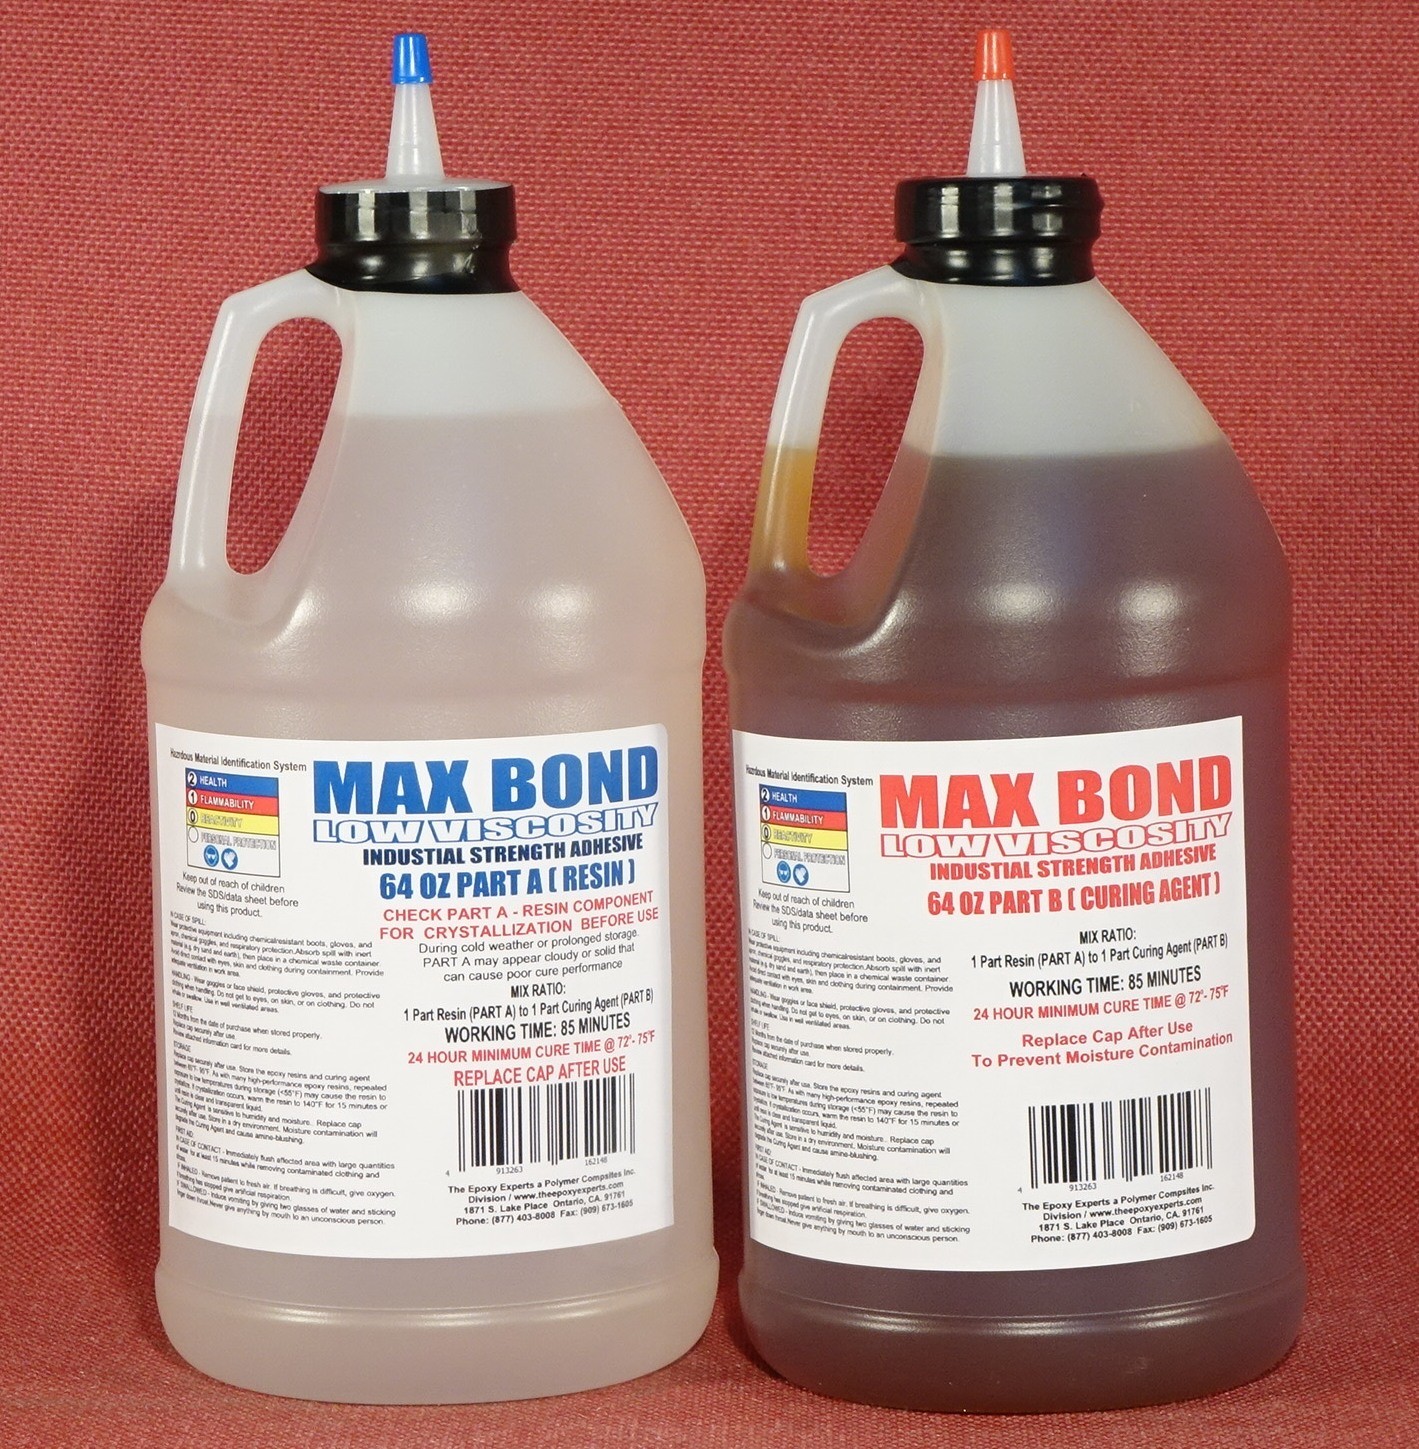
MAX BOND LOW VISCOSITY A/BFor Wood Sealing, Waterproofing, Fiberglassing And As A StrongAdhesive For Structural Bonding
EPOXY/POLYAMIDE RESIN SYSTEM
1 US GALLON COMBINED VOLUME (128 FL.OZ)
1/2 GALLON PART A (64 FL.OZ)
1/2 GALLON PART B (64 FL.OZ)
Marine Environment Construction And Repair Resin System
Epoxy/Polyamide based resins are one of the best systems to use for applications that will be subject to water immersion and marine environments. It provides excellent resistance to salt water, acidic and caustic exposure and retains its physical properties even after prolonged water immersion.
PRODUCT DESCRIPTION
MAX BOND LOW VISCOSITY A/B is a two-part epoxy/polyamide resin system specially formulated to provide structural strength to a variety of marine and boat building usessuch as structural fiberglassing,waterproofing, and high strength bonding application.
It is the low viscosity version (thinner) of MAX BOND family of marine grade resin systems providing improved ease of use and faster fiberglass fabric wetting.
Bonds To Steel, Aluminum, Metals, Concrete, Fiberglass, And Composites
Waterproofing Sealant For Wood, Metals, Concrete
1:1 Mix Ratio, Equal Parts By Volume Or By Weight
Brush, Roller Coat, Trowel Applied
Excellent Impact Resistance
Excellent Balance Of Strength And Flexibility
Excellent Water/Salt Water Resistant For Marine/Aero Applications
Low Shrinkage, Wide Range Of Service Temperature
The consistency of this formulation is similar to honey(5600 cPs @77°F).
It is only diluted from the base epoxy and curing agentformulation to yield ease of use and general fabricimpregnation.Over dilution of epoxy resin(below 1000 cPs,similar to the consistency of glycerin) is diluted with lower functional epoxydiluents, which also dilutes its cured mechanical strength.
MAX BOND LOW VISCOSITY A/B demonstrates structural bondstrengths to a variety of substrates commonly used in the manufacturing ofmodern marine vessels of such as wood, steel, aluminum, copper and other metalalloys, polyester constructed fiberglass, and most plastics.
It is an excellent resin system as an impregnating resinfor fiberglass fabrics, wood reinforcing, waterproofing, and all manners ofboat building construction, repair, and maintenance.
MAX BOND LOW VISCOSITY A/B performs well in a wide rangeof service temperatures and resists cracking and delamination caused byrepeated impact, cyclic vibration, thermal expansion/contraction, and physicalbreakdown due to continuous seawater immersion.
MAX BOND LOW VISCOSITY A/B will cure in humid andlow-temperature conditions. It is room temperature cured or heat cured forfaster cure time.
WHICH EPOXY IS BEST FOR YOUR APPLICATION?
Epoxy-based polymers are one of the most versatilethermosetplasticsthat can be modified into a multitude ofapplications and fit very specific tasks as demanded by theapplication.Itoffers ease of use and is generally safer tohandle over other types of thermoset resins, which makes it the choice materialfor many high-performance composites.
What is Impact testing?
Impact testing is one of the most revealing test methods.It demonstrates amaterial's ability to resist and withstand a high rateof pressure loading in a short amount of time.The material's behaviorduring and after the impactcan define its maximum mechanical property andconditional limits upon destruction.
Why is Impact Testing Important?
The impact resistance of an object provides a goodmeasure of its resistance to definitive destruction. Governed by the many lawsand dynamics of physics, a skilled chemist or materials engineer can determinethe designequilibrium and ultimate performance by carefully analyzing thematerial's disassociation and the manner of its destruction.
With this knowledge, other aspects of mechanical performancecan be accurately derived. Through engineering, one can determine the impactenergies the cured resin can withstand and design the construction that resistssuch physical damage from impact force.
ddd
High Impact Boat Building Marine Grade Epoxy Resin For Impregnating \u0026 Fiberglassing \u0026 Wood Sealing.
Video will open in a new window
Using the App? Paste link into a browser window:
[isdntekvideo]
THIS KIT INCLUDES A SET OF YORKER CAPS FOR CONTROLLED DISPENSING.
Use these Yorker caps to dispense the material with ease and minimize over pouring and reduce spills.
We do not recommend usingdispensing pumps for prolonged use and storage.
The curing agent or PART B of any epoxy resin system is sensitive to moisture and carbon dioxide, which readily reacts with the curing agent and form carbamate crystals lower strength and performance.Epoxy Curing Agent Reacting With Carbon Dioxide Forming Insoluble Carbamate Crystals
How To Use This Resin System
Review All Published Data Regarding This Product.
Prepare the surface for bonding or coating, especially if applying over an old coating
Proper Usage Data And Other Detailed Information Are Posted At This Page.
Mix the Resin And Curing Agent Only After The Surface Is Prepared For Application.SURFACE PREPARATION BEFORE APPLICATION
The quality of adhesion of any coating or adhesive application is dependent on how well the surface is prepared.The resin system must be able to properly 'wet-out' the surface to form a continuous film.
Surfaces demonstrating poor wettability prevents the liquid resin from forming a cohesive bond.
Improper surface wetting yields poor adhesion and will delaminate during use.
Wetting is the ability of a liquid to wet-out a solid surface; its dynamics is expressed as surface tension.
A surface that demonstrates low surface tension, such as waxed surface, oily surface or slick plastics like Teflon will prevent the liquid resin to wet-out and cause poor adhesion.In the same respect, if the surface is coated from a previous application, the epoxy adhesion is limited to adhesion quality of the primary coating is applied over.
For best results, make sure to remove any loose or peeling old coating before application to avoid delamination.
If possible, remove the old coating by mechanicalsanding or power washing so the applied epoxy is in direct contact with the base substrate.
Applying the MAX BOND LOW VISCOSITY over an oil-based stain should be avoided.
Watch Video Demonstration On How To Test And Prepare The Surface Before Applying Any Coating or Adhesive
Why Coatings Bead Up \u0026 Separate. Surface Test \u0026 Prep Before Applying Epoxy Coating To Avoid Crawling
Video will open in a new window
Using the App? Paste link into a browser window:
[isdntekvideo]
RESIN CRYSTALLIZATION
FROM PROLONGED STORAGE OR COLD TEMPERATURE EXPOSURE
Check The PART A RESIN Bottle For Crystallization
During the winter months, the PART A or RESIN component may crystallize and cause poor cure performance.Our MAX Epoxy Resins are formulated with high purity grade resin polymers which makes it prone to crystallization when exposed to temperatures below 57°F. Crystallization can also occur after the resin has been stored over a period.It will appear as a waxy white mass at the bottom of the bottle.The PART A or RESIN component must be in its liquid form to thoroughly mix with the PART B or curing agent to achieve full cure.
DO NOT USE UNLESS PROCESSED
View the following video for identification and processing.
EPOXY RESIN CRYSTALLIZATION - Solidified Epoxy Resin Processing
Video will open in a new window
Using the App? Paste link into a browser window:
[isdntekvideo]
DETERMINE THE AMOUNT THE BATCHSIZE NEEDED
Cut and paste this link to use into account that some of the coating thickness will be absorbed into the porosity or the roughness of the surface.Begin by mixing a small batch to gain experience with the polymerization process of the resin system.
Blending amounts greater than 1000.0 grams or 1 quart in volume requires careful mixing.
The mixed resin must be applied within the established working time to prevent a "run-away" reaction.
Do not let the mixed resin to sit in mass greater than 10 minutes.
The exothermic heat generated during polymerization will accelerate the chemical reaction and cause a 'run-away' reaction to occur.A 'run-away' reaction can produce temperatures above 300°F and cause an uncontrollablechemical reaction.Mix the proper amount of resin and curing agent and apply within 10-15 minutes to avoid this from occurring.
Calculate the amount to be mixed by measuring the length x width x thickness of the area to be coated to obtain the cubic volume of the resin needed.
Use These Factors To Convert Gallon Needed Into Volumetric Or Weight Measurements.
Fluid Gallon To Volume Conversion
1 Gallon = 231 Cubic Inches
1 Gallon = 128 Ounces
1 Gallon = 3.7854 Liters
1 Gallon = 4 Quarts
1 Gallon = 16 Cups
Fluid Gallon Mass Conversions
1 Gallon Of Mixed Unfilled Epoxy Resin = 9.23 Pounds
1 Gallon Of Mixed Unfilled Epoxy Resin = 4195 Grams
Epoxy Resin MixingProcedure
The proper cure and final performance of any epoxy resin system are highly dependent on the quality and thoroughness of the mixing quality.The resin and curing agent must be mixed to homogeneous consistency to achieve proper cure and tack-free results.
For best cure results, measure the resin and curing agent using a weighing scale. Mix the resin and curing agent by hand to minimize air bubble entrapment.
Blend for 3 minutes and transfer the entire mixture in another clean container and mix for another 2 minutes.
This technique will prevent tacky or uncured resin and ensure a homogeneousmixture.
The demonstration below utilized a different resin system than the MAX BOND LOW VISCOSITY.
This mix technique is applicable for mixing two component epoxy resin system
Click The Play Button To View Mixing DemonstrationPROPER MIXING TECHNIQUE FOR ANY EPOXY RESIN SYSTEM
How To Mix Epoxy Resin For Food Contact Coating. Avoid Tacky Spots, Minimize Air Bubble When Mixing - YouTube
Video will open in a new window
Using the App? Paste link into a browser window:
[isdntekvideo]
PHYSICAL PROPERTIES
Density (Mixed)
1.10 gm/cc
Form and Color
Part A – Clear Liquid
Part B – Amber Liquid
Viscosity Mixed
5,624 cPs @ 77°F (25ºC)
Mix Ratio
Equal parts by weight or by volume
Working Time
65 Minutes @ 77°F (25ºC) (200 gm mass)
Peak Exotherm
280°F 300 gram mass
Cure Time
36 Hrs. Minimum
Accelerated Heat Cure Time
2 Hrs. @ room temperature plus
120 min. @ 212°F (100°C)
MECHANICAL PROPERTIES
Hardness
85 Shore D
Tee-Peel Strength
3.7 Pounds Per Inch Width
Compressive Strength
12,300 psi @ 77°F (25ºC)
Tensile Shear Strength
3,800 psi @ 77°F (25ºC)
1,900 psi @ -112°F (-80ºC)
1050 psi @ 212°F (100ºC)
Elongation
2.3% Maximum Yield
Service Temperature
-67°F to 250°F
Dielectric Value
Electrical insulation
510 volts per .001"
film thickness
CHEMICAL RESISTANCE TEST
10 Day Soak Test @ 77°F (25°C) -WEIGHT CHANGE IN PERCENT
Distilled Water
.17 %
3% Salt Water
.21 %
Sulfuric Acid 30%
1.9 %
Nitric Acid
3.8 %
Ammonia 10%
3.7 %
Sodium Hydroxide
10.00 %
Anti-FreezeorMotor Oil
No Effect
Customer Boat Building Video With MAX BOND LOW VISCOSITY
Blondie Build vlog003: How to fillet with epoxy and wood flour.
Video will open in a new window
Using the App? Paste link into a browser window:
[isdntekvideo]
Transom Fabrication
MAX BOND LOW VISCOSITY was used as a laminating adhesive to bond 3/4 inch plywood to create the transom.
It was also used as a coating to seal the wood, yieldinga waterproofprotective coating.
BASICS STEPS OF WOOD SEALING AND WATERPROOFING
For Trailer Flooring Or Boat Deck Replacement
Step 1.
Ensure that the wood is as dry as possible
Excessive moisture will be sealed the wood once it is coated with the resin.
Pre-cut the plywood to the desire size and shape before applying the epoxy coating. Cutting will be very difficult once the plywood has been sealed with the epoxy resin.Step 2.MAX BOND LOW VISCOSITY Preparation And Mixing
Prepare the MAX BOND LOW VISCOSITY, prewarm or temper the Resin and Curing Agent To 75°F for best results.
The viscosity and cure time of the resin system is greatly affected by temperature; it will be thicker and cure slower during colder temperature and thinner and cure faster during the summer months.
The mix ratio is 1:1 by volume or by weight and offers up to 60 minutes of working time.Blend the two components until uniform in consistency, hand mix or use a mixer at slow speed as not to introduce air bubbles.Thinning The MAX BOND LOW VISCOSITY With Acetone (Optional)
Use a fast evaporating solvent to dilute the epoxy such as acetone to reduce the viscosity and improve wetting and saturating porous wood.This will create an effective wood penetrating sealer and upon cure, it will saturate the wood more efficiently and seal the wood completely.Add no more than 5% solvent by weight or by volume to the mixed resin.
Too much solvent will retard the reaction rate of the resin and will cure slowly to weak and soft finish.How To Accurately Calculate 5% Solvent Addition By Weight
Determine The Weight Of The Mixed Resin And Curing Agent. = W1
Divide W1by 95% = W2
Multiply W2by 5% = W3
Add W3+ W1= Mixed Epoxy 95% + Acetone 5% = 100% with 5% Acetone Diluted Epoxy/Curing Agent Mixture
For Example;
1000 Grams Of Mixed Epoxy And Curing Agent / .95 = 1053.0 Grams ( W1)
1053.0 grams x .05 = 52.6 grams ( W2) Amount Of Acetone Needed
1000 Grams ( W1) + 52.6 Grams ( W2) =1052.6 GramsTotal Epoxy/Curing Agent Plus 5% Acetone Dilute Mixture
Mixture Weights To Make 1 Quart Of MAX BOND LOW VISCOSITY With 5% Acetone Dilution
This Amount Will Coat Two Sheets Of All Sides Of A 4' x 8' Plywood
Application Procedure
Use a brush, or a short-nap roller to apply the resin/solvent mixture.
A thick roller nap is not recommended as the resin cures prematurely due to resin build-up in the roller.
Allow the first application to absorb for 10 minutes to allow the acetone to evaporate and then apply a second coat to ensure resin saturation.First coat will be readily absorb by the uncoated wood.
Apply a second coat consecutively to seal the wood porosity and allow to cure.
This will also improve the structural strength of the plywood by binding all the wood fibers into a unitized matrix.
Some 'grain-raising' may occur that can be sanded upon cure with fine-grit sandpaper and then re-coated.
Second ApplicationAfter 24 Hour Cure
Once the first coat has cured to the touch (after 9 to 12 hours), apply the final coat of MAX BOND LOW VISCOSITY.
Omit the solvent addition for the final coat to yield the best cured water resistance, mechanical properties and coating performance.Completely Cured Waterproof And Reinforced Plywood Ready For InstallationFIBERGLASSING
Fiberglass Fabric Best Suited For Boat Building and Repairs
Use the Style 7500 For Flat Layups
10-Oz Fiberglass Plain Weave Style 7500
3 Yards
10-Oz Fiberglass Plain Weave Style 7500
5 Yards
10-Oz Fiberglass Plain Weave Style 7500
10 Yards
9-Oz Fiberglass 8 Harness Satin Weave Style 7781
2 Yards
9-Oz Fiberglass 8 Harness Satin Weave Style 7781
5 Yards
9-Oz Fiberglass 8 Harness Satin Weave Style 7781
10 Yards
Choose the proper fiberglass weight and weave for the job.The fiberglassreinforcement should be applied on pre-sealed wood as demonstrated above.Apply the mixed resin first, then lay the fiberglass fabric over the resin and allow to absorb.Use a plastic spreader or flat plastic spreader to consolidate the fiberglass to wood.Use this to consolidate the fiberglass to the wood and remove excess resin and entrapped airbubbles.Allow the epoxy resin to cure for 24 hours.- Upon cure, the laminate can be directly painted witha UV resistantpolyurethane or acrylic clear or colored paint to protect the epoxy resin from the damaging effectsof direct UV (sunlight) exposure.
AVAILABLE KIT SIZES
32 OUNCE KIT
64 OUNCE KIT
1 GALLON KIT
2 GALLON KIT
10 GALLON KIT
AVAILABLE FIBERGLASS, CARBON FIBER, AND KEVLAR FABRICS
FIBERGLASS PLAIN WEAVE1.5-OUNCEHEXCEL120- 5 YARDS
FIBERGLASS PLAIN WEAVE 1.5-OUNCEHEXCEL 120-10YARDS
FIBERGLASSPLAIN WEAVE 7.0-OUNCEHEXCEL 7532-5 YARDS
FIBERGLASS PLAIN WEAVE 10-OUNCESTYLE 7500 -3 YARDS
FIBERGLASS PLAIN WEAVE 10-OUNCESTYLE7500 -5 YARDS
FIBERGLASS SATIN WEAVE 9.0-OUNCEHEXCEL 7781 -5YARDS
CARBON FIBER FABRIC 3K 2x2 TWILL WEAVE 6 OZ-3 YARDS
CARBON FIBER FABRIC 3K PLAIN WEAVE 6-OZ -3 YARDS
Cedar Wood On The Right Was Epoxy Sealed And Fiberglass Reinforced
Pictures contributed by Mr. Lee R.
Jet Ski Hull Fabricated With Kevlar Fabric Impregnated WithMAX BOND LOW VISCOSITY A/B
Wood Veneers Laminated With MAX BOND LOW VISCOSITY
ADDING COLOR WITHMAXCOLOR PIGMENT CONCENTRATES
Color pigment addition to an epoxy resin system with a scale - YouTube
[isdntekvideo]
Adding ColorThese are color concentrates only and must be dispersed in an epoxy resin or PART A component.
Converting the clear resin to an opaque pigmented color improves UV resistance.
MAX COLOR class="MsoNormal" style="font-size: 14pt; text-align: start; background: white;">
COMPOSITE FABRICATING BASIC GUIDELINES
By definition, a fabricated COMPOSITE material is a manufactured collection of two or more ingredients or products intentionally combined to form a new homogeneous material.
The created composite is defined by its performance that is greater than the sum of its individual parts.
This method is also defined as a SYNERGISTIC COMPOSITION.
COMPOSITE MATERIALCOMPOSITION
REINFORCING FABRIC& IMPREGNATING RESIN
PLUS
'ENGINEERED PROCESS'
EQUALS
COMPOSITE LAMINATE WITH THE BEST WEIGHT TO STRENGTH PERFORMANCE
Note The Uniformity Between The Impregnating Resin And Fiberglass Fabric Making A Transparent Laminate
With respect to the raw materials selection -fabric and resin, the fabricating process and the and curing and test validation of composite part, these aspects must be carefully considered and in the engineering phase of the composite.
Step One:Fabric Selection
TYPESOF FABRIC WEAVE STYLE AND SURFACE FINISHING
FORRESIN TYPE COMPATIBILITY
Fabrics are generally considered ”balanced” if the breaking strength is within 15% warp to fill and are best in bias applications on lightweight structures.
“Unbalanced” fabrics are excellent when a greater load is required one direction and a lesser load in the perpendicular direction.
- Tow: The bundle of individual carbon filaments used to weave carbon fabric. 50k tow means there are 48-50,000 carbon filaments in the tow. Smaller tow i.e. 12k, 6k, 3k and 1k are obtained by dividing the 50k tow into smaller bundles.
- Thread Count: The number of threads (tow in carbon and yarn in Aramid) per inch. The first number will be the warp count and the second will be the fill count.
- Fill: The threads that run the width of the roll or bolt and perpendicular to the warp threads.
- Warp: The threads that run the length of the roll or bolt and perpendicular to the fill threads.
- Finish: The chemical treatment to fiberglass making it compatible with resin systems, therefore improving the bond between the fiber and the resin. Finishing fiberglass typically decreases the fiber strength by as much as 50%. Both Silane and Volan finishes are epoxy compatible. Historically, Volan has been considered a softer finish for a more pliable fabric, but recent advances have yielded some excellent soft Silane finishes.
- Thickness: Measured in fractions of an inch. The thicker the fabric the more resin required to fill the weave to obtain a surface-smooth finished part.
Weaves:
- Plain weave means the warp and fill threads cross alternately. This is the most common weave.
- 4 Harness (4 HS Satin or crowfoot) weave means the fill thread floats over three warp threads, then under one warp thread. This weave is more pliable than the plain weave, therefore conforms to complex curves more easily.
- 8 Harness (8 HS Satin) weave means the fill thread floats over seven warp threads, then under one warp thread. This weave is the most pliable of the standard fiberglass weaves.
- 2 x 2 Twill weave means the fill thread floats over two warp threads, then fewer than two warp threads. This weave is found most commonly in carbon fabrics and is more pliable than plain weave.
Most fabrics are stronger in the warp than the fill because higher tension is placed on the warp fiber keeping it straighter during the weaving process. Rare exceptions occur when a larger, therefore stronger thread is used in the fill direction than the warp direction.
PLAIN WEAVE
Isa verysimple weave pattern and the most common style. The warp and fill yarns are interlaced over and under each other in alternating fashion.Plain weave provides good stability, porosity and the least yarn slippage for a given yarn count.
8 HARNESS SATIN WEAVE
The eight-harness satin is similar to the four-harness satin except that one filling yarn floats over seven warp yarns and under one.
This is a very pliable weave and is used for forming over curved surfaces.
4 HARNESS SATIN WEAVE
The four-harness satin weave is more pliable than the plain weave and is easier to conform to curved surfaces typical in reinforced plastics. In this weave pattern, there is a three by one interfacing where a filling yarn floats over three warp yarns and under one.
2x2TWILL WEAVE
Twill weave is more pliable than the plain weave and has better drivability while maintaining more fabric stability than a four or eight harness satin weave. The weave pattern is characterized by a diagonal rib created by one warp yarn floating over at least two filling yarns.
SATINWEAVE TYPE CONFORMITYUNTO CURVED SHAPES
Plain Weaves, Bi-axial, Unidirectional StylesFor Directional High Strength PartsUse this weave style cloth when high strength parts are desired.It isidealfor reinforcement, mold making, aircraft andauto parts tooling,marine, and other composite lightweight applications.7544 Fiberglass - YouTube
FIBERGLASS FINISHING FOR RESIN COMPATIBILITY
All of our fiberglass fabrics is woven By HEXCEL COMPOSITES, a leading manufacturer of composite materials engineered for high-performance applications in marine, aerospace for commercial and military, automotive, sporting goods and other application-critical performance. These fabrics are 100% epoxy-compatible and will yield the bestmechanicalproperties when properly fabricated.
AVAILABLE FIBERGLASS, CARBON FIBER, AND KEVLARFABRICS
AVAILABLE FABRICS
LENGTH
CLICK THE LINK TO VIEW & ADD TO CART
1.5-Oz Fiberglass Plain Weave Style 120
5 Yards
1.5-Oz Fiberglass Plain Weave Style 120
10 Yards
7-Oz Fiberglass Plain Weave Style 7532
5 Yards
10-Oz Fiberglass Plain Weave Style 7500
3 Yards
10-Oz Fiberglass Plain Weave Style 7500
5 Yards
10-Oz Fiberglass Plain Weave Style 7500
10 Yards
9-Oz Fiberglass 8 Harness Satin Weave Style 7781
2 Yards
9-Oz Fiberglass 8 Harness Satin Weave Style 7781
5 Yards
9-Oz Fiberglass 8 Harness Satin Weave Style 7781
10 Yards
6-Oz Carbon Fiber 3K 2x2 Twill Weave 50 Inch Wide
3 Yards
6-Oz Carbon Fiber 3K Plain Weave With Tracers
3 Yards
Step Two:
Choose The Best Epoxy Resin SystemFor The ApplicationThe epoxy resinused infabricating a laminatewill dictate how theFRP will perform whenload or pressure is implied on the part.
To choose the proper resin system, consider the following factorsthat is crucial to a laminate's performance. SIZE AND CONFIGURATION OF THE PART(NUMBER OF PLIES AND CONTOURED, FLATOR PROFILED)CONSOLIDATING FORCE(FREE STANDING DRY OR HAND LAY-UP, VACUUM BAG OR PLATEN PRESS CURING)CURING CAPABILITIES(HEAT CURED OR ROOM TEMPERATURE CURED)LOAD PARAMETERS(SHEARING FORCE, TORSIONAL AND DIRECTIONAL LOAD, BEAM STRENGTH)ENVIRONMENTAL EXPOSURE
The principal role of the resin is to bind thefabric into ahomogeneousrigidsubstrate(OPERATING TEMPERATURE, AMBIENT CONDITIONS, CHEMICAL EXPOSURE, CYCLIC FORCE LOADING)MATERIAL AND PRODUCTION COST(BUYING IN BULK WILL ALWAYS PROVIDE THE BEST OVERALL COSTS)
These factors will dictate the design and the composition of the part and must be carefully considered during the design and engineering phase of the fabrication.
TOP SELLING IMPREGNATING RESIN SYSTEM
MAX BOND LOW VISCOSITY A/B
Marine GradeBoatBuildingResin System, Fiberglassing/Impregnating, Water Resistance, Structural Strength
MAX BOND LOW VISCOSITY32-Ounce
MAX BOND LOW VISCOSITY64-Ounce
MAX 1618 A/B
Crystal Clear, High Strength, Lowest Viscosity (Thin), Durability & Toughness, Excellent Wood Working Resin
MAX 1618 A/B 48-Ounce Kit
MAX 1618 A/B 3/4-Gallon Kit
MAX 1618 A/B 3/4-Gallon Kit
MAX 1618 A/B 1.5-Gallon Kit
MAX CLR A/B
Water Clear Transparency, Chemical Resistance, FDA Compliant For Food Contact, High Impact, Low Viscosity
MAX CLR A/B 24-Ounce Kit
MAX CLR A/B 48-Ounce Kit
MAX CLR A/B 96-Ounce Kit
MAX CLR A/B 96-Ounce Kit
MAX CLR A/B 1.5-Gallon Kit
MAX GRE A/B
GASOLINE RESISTANT EPOXY RESIN
Resistant To Gasoline/E85 Blend, Acids & Bases, Sealing, Coating, Impregnating Resin
MAX GRE A/B 48-Ounce Kit
MAX GRE A/B 96-Ounce Kit
MAXHTEA/B
HIGH-TEMPERATURE EPOXY
Heat Cured Resin System For Temperature Resistant Bonding, Electronic Potting, Coating, Bonding
MAX HTE A/B 80-Ounce Kit
MAX HTE A/B 40-Ounce Kit
Step Three:
Proper Lay-Up Technique -Putting It All Together
Pre-lay-up notes
- Lay out the fabric and pre-cut to size and set aside
- Avoid distorting the weave pattern as much as possible
- For fiberglass molding, ensure the mold is clean and adequate mold release is used
- View our video presentation above "MAX EPOXY RESIN MIXING TECHNIQUE"
- Mix the resin only when all needed materials and implements needed are ready and within reach
Mix the proper amount of resin needed and be accurate proportioning the resin and curing agent.Adding more curing agent than the recommended mix ratio will not promote a faster cure.Over saturation or starving the fiberglass or any composite fabric will yield poor mechanical performance. When mechanical load or pressure is applied to the composite laminate, the physical strength of the fabric should bear the stress and not the resin. If the laminate is over saturated with the resin it will most likely to fracture or shatter instead of rebounding and resist damage.
Don’t how much resin to use to go with the fiberglass?
A good rule of thumb is to maintain a minimum of 30 to 35% resin content by weight.
This is the optimum ratio used in high-performance prepreg (or pre-impregnated fabrics) typically used in aerospace and high-performance structural application.
For general hand lay-ups, calculate using 60% fabric weight to 40% resin weight as a safety factor.
This will ensure that the fabricated laminate will be below 40% resin content depending on the waste factor accrued during fabrication.
Place the entire pre-cut fiberglass to be used on a digital scale to determine the fabric to resin weight ratio.Measuring by weight will ensure accurate composite fabrication and repeatability, rather than using OSY (ounces per square yard) or GSM ( grams per meter square) data.
A good rule of thumb is to maintain a minimum of 30 to 35% resin content by weight, this is the optimum ratio used in high-performance prepreg (or pre-impregnated fabrics) typically used in aerospace and high-performance structural application. For general hand lay-ups, calculate using 60% fabric weight to 40% resin weight as a safety factor. This will ensure that the fabricated laminate will be below 40% resin content depending on the waste factor accrued during fabrication.
Place the entire pre-cut fiberglass to be used on a digital scale to determine the fabric to resin weight ratio. Measuring by weight will ensure accurate composite fabrication and repeatability, rather than using OSY data.
Typical fabric weight regardless of weave pattern
1 ounce per square yard is equal to 28.35 grams
1 square yard equals to 1296 square inches (36 inches x 36 inches)
FOR EXAMPLE
1 yard of 8-ounces per square yard (OSY) fabric weighs 226 grams
1 yard of 10-ounces per square yard (OSY) fabric weighs 283 grams
Ounces per square yard or OSY is also known as aerial weight, which is the most common unit of measurement for composite fabrics.To determine how much resin is needed to adequately impregnate the fiberglass, use the following equation:
(Total Weight of Fabric divided by 60%)X( 40%)= weight of mixed resin needed
OR
fw= fabric weight
rc= target resin content
rn=resin needed
MASTER EQUATION
(fw/60%)x(40%)=rn
FOR EXAMPLE
1 SQUARE YARD OF 8-OSY FIBERGLASS FABRIC WEIGHS 226 GRAMS
(226 grams of dry fiberglass / 60%) X 40% = 150.66 grams of resin needed
So for every square yard of 8-ounce fabric, itwill need 150.66 grams of mixed resin.
Computing For Resin And Curing Agent Amount
150.66 grams of resin needed for 1 square yard of fiberglass fabric
MIX RATIO OF RESIN SYSTEM IS 2:1 OR50 PHR (per hundred resin)
2 = 66.67% (2/3)
+
1 = 33.33%(1/3)
=
(2+1)=3 or (66.67%+33.33%)=100% or (2/3+1/3)= 3/3
150.66 x 66.67%= 100.45 grams of Part A RESIN
150.66 x 33.33%= 50.21 grams of Part B CURING AGENT
100.45 + 50.21 = 150.66 A/B MIXTURE
GENERAL LAY-UP PROCEDURE
Apply the mixed resin onto the surface and then lay the fabric and allow the resin to saturate through the fabric.
NOT THE OTHER WAY AROUND
This is one of the most common processing error that yields sub-standard laminates.
By laying the fiberglass onto a layer of the prepared resin, less air bubbles are entrappedduring the wetting-out stage.
Air is pushed up and outwards instead of forcing the resin through the fabric which will entrap air bubbles.
This technique will displace air pockets unhindered and uniformly disperse the impregnating resin throughout the fiberglass.
HAND LAY-UP TECHNIQUE
Eliminating air entrapment or void porosity in an epoxy/fiberglass lay-up process
Fiberglass Hand Lay Up For Canoe and Kayak Building
Video will open in a new window
Basic Hand Lay-up Fiberglassing
Video will open in a new window
VACUUM BAGGING PROCESS
For performance critical application used in aerospace vehicles, composite framing for automotive vehicles and marine vessels,
a process called 'Vacuum Bagging' is employed to ensure the complete consolidation of every layer of fabric.The entire tooling and lay-up are encased in an airtight envelope or bagging and a high-efficiency vacuum pump is used to draw out the air within the vacuum bag to create a negative atmospheric pressure.
Once a full vacuum (29.9 Inches of Mercury) is achieved, the negative pressure applies a compacting force of 14.4 pounds per square inch
(maximum vacuum pressure at sea level) is applied to the vacuum bag transferring the force to the entire surface area of the laminate.
Vacuum pressure is maintained until the resin cures to a solid. For room temperature curing resin system, the vacuum pump is left in operation for a minimum of 18 hours.
External heat can be applied to the entire lay-up, thus accelerating the cure of the resin system.
The vacuum force also removes any entrapped air bubble between the layers of fabric and eliminate what is called, porosity or air voids.
Porosity within a laminate creates weak spots in the structure that can be the source of mechanical failure when force or load is applied to the laminate.
Thestandard atmosphere(symbol: atm) is aunit of pressuredefined as101325Pa(1.01325bar), equivalent to760mm Mercury or29.92inches Mercury or14.696pounds per square inch of pressure.
Vacuum Bagging
Video will open in a new window
AUTOCLAVE CURING PROCESSAutoclave curing processing is the most common method used inthe large-scale production of compositeproducts.
The Aerospace Industry, which includes space exploration rockets and vehicles, deep space structures, and commercial and military airplane utilizes this composite fabrication process due to the critical nature of the application.
The mechanical demands of the composite are often pushed to the upper limits and autoclaved process yieldscomposites with the best weight to strength ratio.
BASIC OPERATION OF THE AUTOCLAVE PROCESS
In the autoclave process, high pressure and heat are applied to the part through the autoclave atmosphere, with a vacuum bag used to apply additional pressure and protect the laminate from the autoclave gases.The cure cycle for a specific application is usually determined empirically and, as a result, several cure cycles may be developed for a single material system, to account for differences in laminate thickness or to optimize particular properties in the cured part. The typical autoclave cure cycle is a two-step process. First, vacuum and pressure are applied while the temperature is ramped up to an intermediate level and held there for a short period of time. The heat reduces the resin viscosity, allowing it to flow and making it easier for trapped air and volatiles to escape. The resin also begins wetting the fibers at this stage. In the second ramp up, the temperature is raised to the final cure temperature and held for a sufficient length of time to complete the cure reaction. During this step, the viscosity continues to drop, but preset temperature ramp rates and hold times then stabilize viscosity at a level that permits adequate consolidation and fiber wetting, while avoiding excessive flow and subsequent resin starvation.These control factors also slow the reaction rate, which prevents excessive heat generation from the exothermic polymerization process.Upon completion, the cured mechanical performance of the composite is often much stronger and lighter compared to a hand lay-up, or vacuum bagged composite laminate.VACUUM INFUSION PROCESSVacuum Infusion Process is also known in the composites industry asVacuum Assisted Resin Transfer Molding or VARTM.
Similar to the Vacuum Bagging Process where the negative pressure is used to apply consolidation force to the laminate while the resin cures, the resin is infused into the fabric lay-up by sucking the impregnating resin and thus forming the composite laminate.
The VARTM Process produces parts that require less secondary steps, such as trimming, polishing or grinding with excellent mechanical properties. However, the vacuum infusion requires more additional or supplemental related equipment and expendable materials. So the pros and cons of each presented composite fabrication process should be carefullydeterminedto suit the user'scapabilitiesand needs.
Please view the following video demonstration which explains the process of Vacuum Infusion or VARTM process.
MAX 1618 A/B VACUUM ASSISTED RESIN TRANSFER MOLDING PROCESS
CARBON FIBER VACUUM INFUSION WITH EPOXY RESIN - VACUUM BAGGING WITH MAX 1618 EPOXY RESIN - YouTube
Video will open in a new window
Step Four: Proper CuringAlthough we have formulated all of our MAX EPOXY RESIN SYSTEM product line to be resistant to amine-blush,it isrecommendednot to mixany resin systems in high humidity conditions, greater than 60%.
Always make sure that the substrate or material the epoxy resin system is being applied to is well preparedas possible to ensure the best-cured performance.
Always review the published data and information for proper usage, application, and general safety information.
Our expert staff of engineers isalways available forconsultationand assistance.
Allow the lay-up to cure for a minimum of 24 to 36 hours before handling. Optimum cured propertiescan take up to 7 days depending on the ambient cure condition.The ideal temperature cure condition of most room temperature epoxy resin is 22 to 27 degrees Celsius at 20% relative humidity. Higher ambient curing temperatures will promote faster polymerization and development of cured mechanical properties.
IMPROVING MECHANICAL PERFORMANCE VIA POST HEAT CUREA short heat post cure will further improve the mechanical performance of most epoxy resins.
Allow the applied resin system to cure at room temperature until for 18 to 24 hours and if possible, expose heat cure it in an oven or other sources of radiant heat (220°F to 250°F) for 45 minute to an hour.You can also expose it to direct sunlight but place a dark colored cover, such as a tarp or cardboard to protect it from ultraviolet exposure.
In general, room temperature cured epoxy resin has a maximum operating temperature of 160°For lower. A short heat post cure will ensure thatthemixed epoxysystem is fully cured, especiallyfor room temperature cure system that can take up to 7 days toachieve 100% cure.Some darkening or yellowing of the epoxy resin may occurif overexposed tohigh temperature (>250 F).
AMINE BLUSHThe affinity ofan amine compound (curing agent) to moisture and carbon dioxide creates a carbonate compoundand forms what is called amine blush.
Amine blush is a wax-like layer that forms as most epoxies cure. If the epoxy system is cured in extreme humidity (>70%).It will be seenas awhite and waxy layer that must be removed byphysical sanding of the surface followed by an acetone wipe.OTHER TYPES OF EPOXY RESIN CURE MECHANISM
LATENT CURING SYSTEMSLatentepoxy resinsare systems thatare mixed together at room temperature and willbegin polymerization but it will not achieve full cure unlessit is exposed to a heat cure cycle. In general, these are high-performance systems that demonstrate exceptional performance under extreme conditions such ashigh mechanical performance underheatand cryogenic temperatures, chemical resistance or any environment that epoxy room temperature system perform marginally or poorly.Upon the mixing of the resin and curing agent polymerization willbegin and willonly achieve a partial cure.Someresins may appear cured or dry to the touch,this state is called'B-Stage Cure',but upon application of force will either be gummy or brittlealmost glass-like and will dissolve in most solvents.The semi-cured resin must be exposed to an elevated temperature for it to continue polymerization and achieve full cure.
HEAT ACTIVATED CURING SYSTEMSThis type of epoxy system will not polymerize unless it is exposed to the activation temperature of the curing agent which can be as low as 200°F and as high as 400°F.
TESTING THE COMPOSITEDetermination Of The Fabric To Resin Ratio
TESTING FABRIC TO RESIN RATIO VIA RESIN BURN OUT
Video will open in a new window
ULTIMATE COMPRESSIVE STRENGTH
ULTIMATE COMPRESSIVE STRENGTH TEST
Video will open in a new window
6500 pounds to failure / 0.498 square inch =13,052 psi MaximumCompressive Strength
SPECIMEN EXAMINATION AFTER COMPRESSION TEST
Video will open in a new window
IMPORTANT NOTICE
Your purchase constitutes the acceptance of this disclaimer.
Please review before purchasing this product.
The user should thoroughly test any proposed use of this product and independently conclude the satisfactory performance in the application.
Likewise, if the manner in which this product is used requires government approval or clearance, the user must obtain said approval.The information contained herein is based on data believed to be accurate at the time of publication. Data and parameters cited have been obtained through published information and Polymer Composites Inc. laboratories using materials under controlled conditions.Data of this type should not be used for a specification for fabrication and design. It is the user's responsibility to determine this Composites fitness for use.There is no warranty of merchantability for fitness of use, nor any other express implied warranty.The user's exclusive remedy and the manufacturer's liability are limited to refund of the purchase price or replacement of the product within the agreed warranty period.Polymer Composites Inc will not be liable for incidental or consequential damages of any kind.Determination of the suitability of any kind of information or product for the use contemplated by the user, the manner of that use and whether there is any infringement of patents is the sole liability of the user.